Stopmotion Explosion Animator (SME) is an easy to use stop motion animation application for MacOS! In this guide you will find detailed instructions for using the software.
As an alternative to reading this guide, watch the video tutorial in the Stopmotion Explosion Content Hub!
- Getting Started
- The Timeline
- Onion Skinning
- Importing Frames
- Exporting Movie Files
- Saving & Opening Projects
- Preferences
Getting Started: Your First Animation in SME
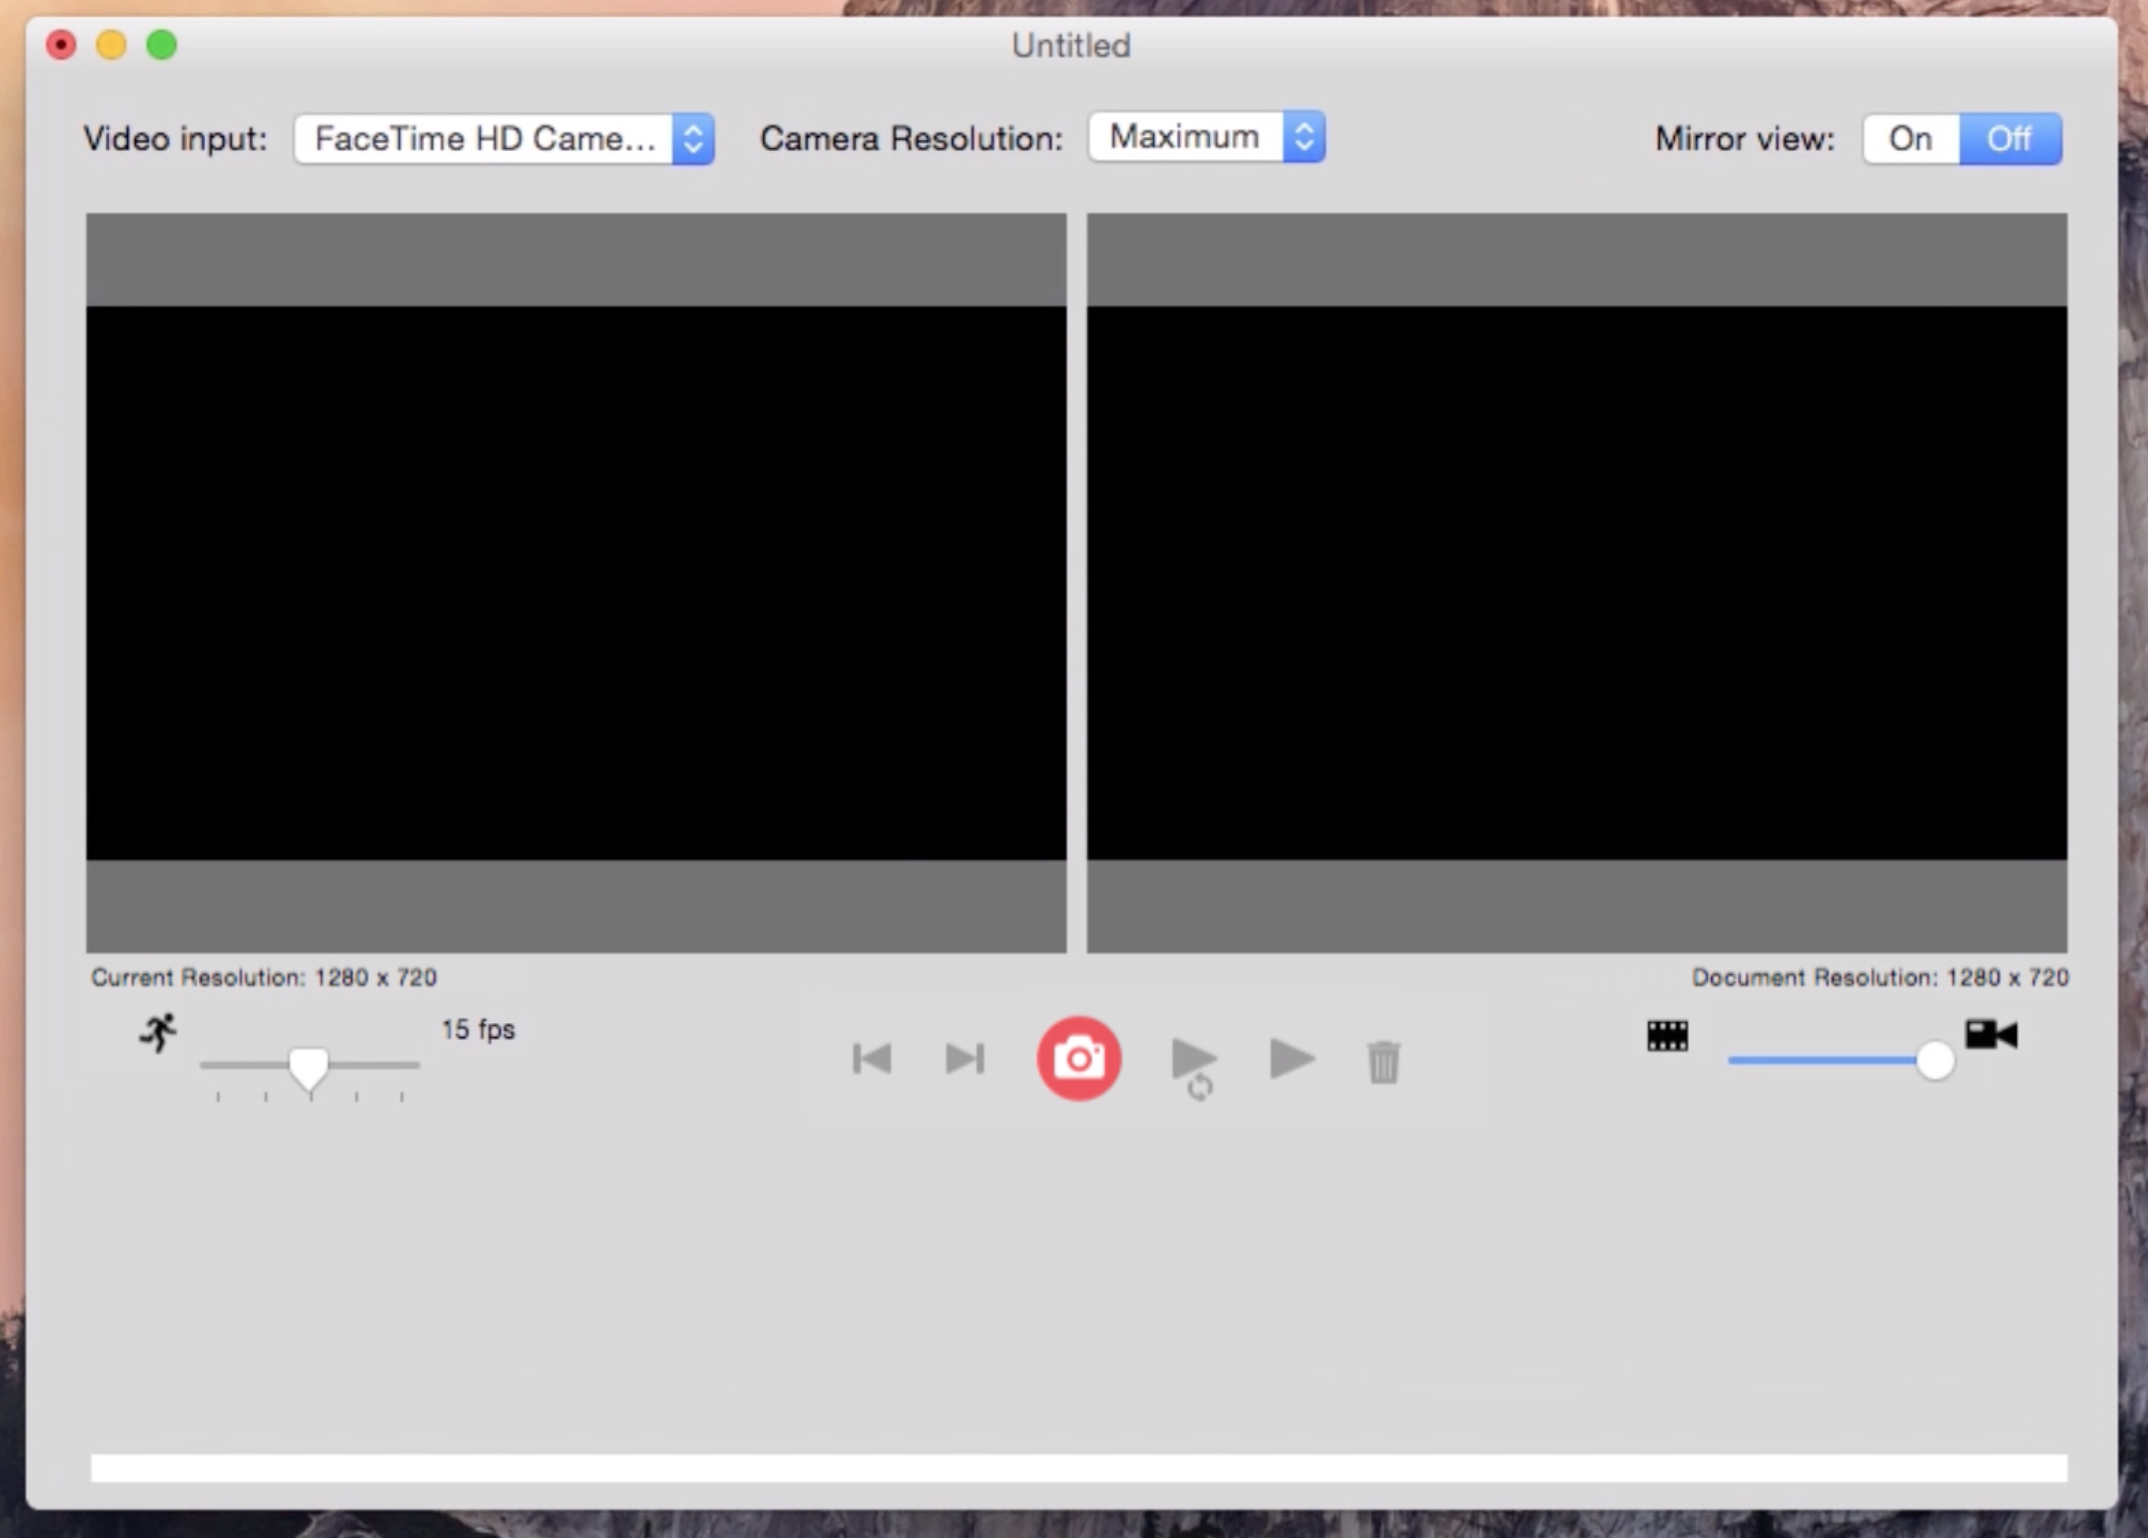
Assuming you have already launched the Stopmotion Explosion Animator app (SME) you should be looking at a window similar to that pictured here.

If you need to create a new SME project, click File New or hit ⌘-N on the keyboard.
Selecting a Camera Input
If you haven’t already, connect the video source you wish to use with SME to your computer. Since most macs now ship with an internal iSight camera, you’ll probably need to switch the camera input from this internal camera to the external video source.

Click the drop-down Video Source menu, and select the camera you wish to use.
Selecting a Video Resolution
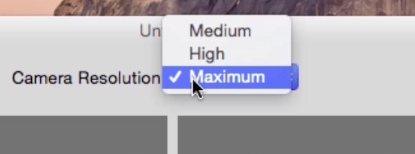
The video source should support multiple camera resolutions. If you click the drop-down Camera Resolution menu, you can choose from one of three resolutions.

At the bottom left, you can see the actual resolution that the camera is outputting.
Starting Your Animation
Click the Capture button to grab an image from the video source. Move the object you are animating slightly. Click the capture button again to grab another image. Repeat until you have captured several animation frames. Click the Play button to preview your work. You will see the frames play back in the right hand window.
Onion Skinning
Onion Skinning is a handy way to compare the last frame you have captured with the current camera image. You can adjust this effect with the onion skinning slider.

Saving a Movie
There are two ways to save your work in SME. If you wish to save an animation and work on it more at a future date, you’ll want to save an SME project file. Click File Save, or hit ⌘-S on the keyboard.
Note that you cannot import or play SME project files as you would a video file. To create a video file for editing in iMovie, or uploading to YouTube, you’ll need to export instead. Click File Export or hit ⌘-E on the keyboard.
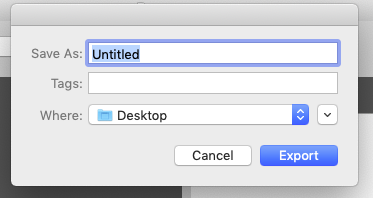
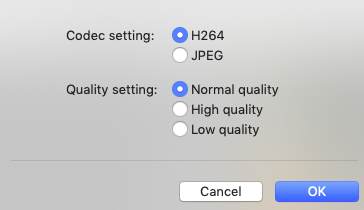
After giving your project file a name, you’ll be able to choose a video codec and quality for the export. For most purposes, the H264 and High Quality settings are best.

The Timeline
Along with the rectangular timeline at the bottom of the Stopmotion Explosion Animator (SME) window, there are several buttons and a slider which control playback.
The capture button grabs images, or “frames” from the current video source.

As you capture frames by clicking the capture button, you’ll see images appearing in the timeline area. These individual frames can be dragged and dropped to re-arrange their order in the animation.

If you select a frame by clicking it, you can delete the frame by clicking the delete button.

Clicking the play button plays the animation from the beginning. Clicking the loop-playback button will loop the animation until the button is clicked again.

The end and beginning buttons move the current timeline position to the end and beginning respectively.

The framerate slider allows you to control the speed of the animation by setting the number of frames per second displayed when the animation plays. Note that this value will also determine the playback speed of the finished video file, so make sure it’s set properly before exporting!

Onion Skinning
The onion skinning effect allows you to compare the last frame captured with the current camera image. The name comes from the thin “onion skin” paper that traditional animators draw on, allowing them to see the previous drawing as they work.

Dragging the slider right increases the amount of image preview from the camera. Dragging the slider left increases the amount of last frame shown.
Importing Frames
Sometimes you will have images that need to be converted into an animation. This can be accomplished by clicking File Import or hitting ⌘-I. Navigate to the directory that contains your images, and select all that you wish to import and click Open.
TIP: Ensure that the images you are importing are the same size as any existing frames in the animation. You can check the dimensions of an existing image by Ctrl-clicking the image file, clicking Get Info, and looking at the Dimensions value (under More Info).
Exporting Movie Files
To create a video file for editing in iMovie, or uploading to YouTube, you’ll need to export instead. Click File Export or hit ⌘-E on the keyboard.

First, type a name and select a location for the video file to be saved to in the file name window.

Next, choose a codec and video quality. For most purposes, H.246 with a “High” quality setting will suffice. This video file can be imported into iMovie with no issues.
You will see a progress bar appear as the frames are converted into a video file. The finished file will be found at the location specified in the file name window.
Saving & Opening Projects
If you wish to save an animation and continue adding to it at a future date, you’ll want to save an SME project file. Click File Save, or hit ⌘-S on the keyboard.
To open a previously created project, Click File Open, or hit ⌘-O on the keyboard.
Note that you cannot play SME project files with media player software, such as QuickTime, or import them into iMovie. You will need to export a movie file first.
Preferences
In the preferences window you can choose which shortcut keys will capture frames, advance the playhead through the timeline and so on. To access this window, click Stopmotion Explosion Animator Preferences, or hit ⌘-,
Comments
0 comments
Please sign in to leave a comment.